Tags
I was invited to an Easter brunch yesterday and thought I should bring something along, as is custom. Although a bottle of champagne for mimosas would have been good enough, I wanted to bring a dish as well. Of course, there is Easter ham, but I wanted to do something different. As luck would have it, the crew at Modernist Cuisine put up a riff on traditional Chinese tea eggs to create a special Easter dish. Perfect! I went to the store and went at it in the kitchen.
Chinese Tea Eggs, An Overview

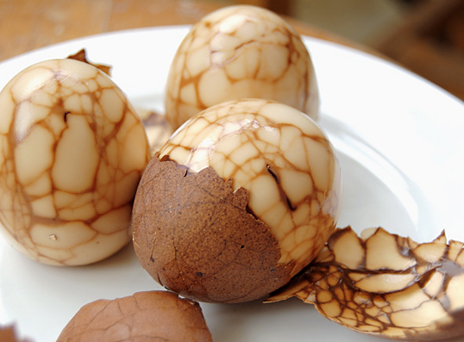
Chinese Tea Eggs (photo: Appetite for China)
Chinese tea eggs are a common snack found in China and Taiwan. Hard boiled eggs have their shells lightly cracked and then they are immersed in a liquid of five-spice powder, soy sauce and tea for three hours or more. Afterwards, the albumen (egg white) is stained with a marbling effect from the tea liquid seeping through the cracks in the shell. Unique and tasty.
The Modernist Cuisine twist on this classic is twofold. First, they marble it with another color that is natural and not food coloring. Second, they enhance the experience of the egg by slow cooking it so that while the whites are firm like a hard boiled egg, the yolk is warm and runny instead of solid and chalky. And, of course, they pull it off. The question is, can I?
Asian Easter Eggin’
I gathered up my ingredients for the egg: eggs, beets, port wine and salt. I have no issue with making a avant garde dish with 30 components, but sometimes it’s nice to see a ‘less is more’ approach when cooking up the funky stuff.
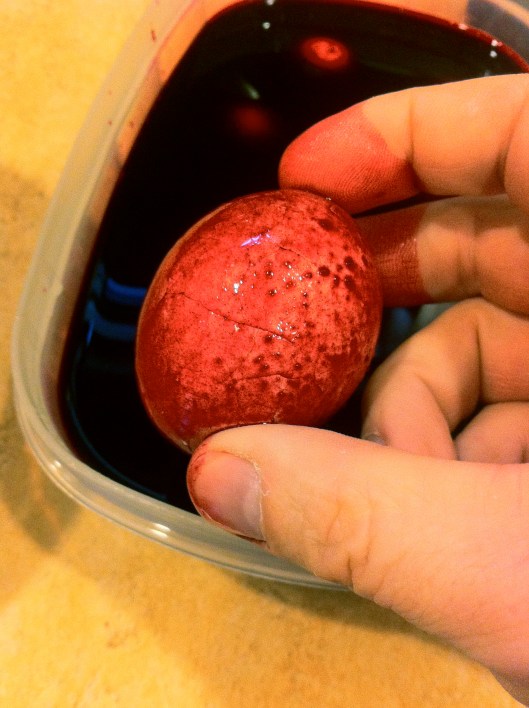
First up I peeled and juiced my beets. My fingers were mauve and barely escaped staining the counters, but I got the job done. From there I mixed the beet juice with port wine and reduced it on the stove. And my Easter egg dye was complete.


Meanwhile I tackled the eggs. After a quick three minute boil (to harden the albumen but not cook the yolk), I removed the eggs and put them in a ice bath to cool down. I realized I didn’t have a lot of ice in the fridge, so I pulled out my ice cream maker bowl out of the freezer and filled in with cold water. Worked just the same.
After 20 minutes I placed them in a bag and put them in the sous vide bath at 62C for 30 minutes. The bag keeps the eggs from rolling around in the bath and potentially cracking. Slow cooking them this way cooks the yolk without coagulating it.
After chilling them again, they were ready to get marbled. I took the back of a spoon and lightly cracked the egg shells, then put the eggs in the beet wine dye to soak overnight.
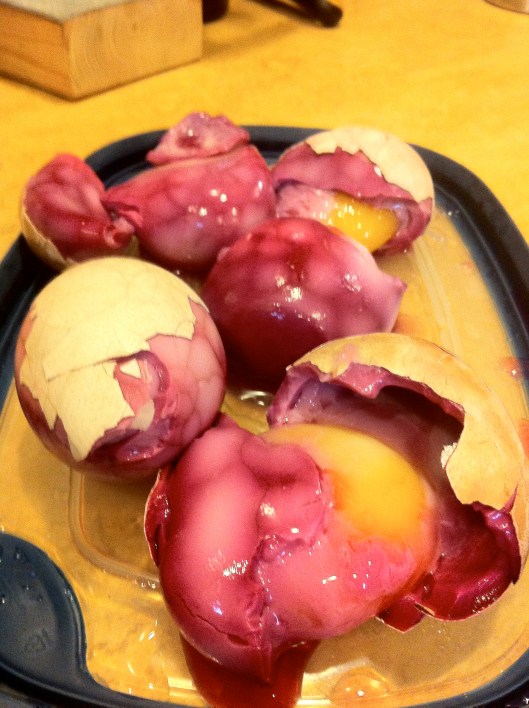
The next day I pulled them out of the dye, and carefully took the eggshell off the eggs to reveal the marbling. Quite cool looking, indeed!
But I learned a couple of very valuable lessons. The first is to make more than you think you need. Why? Because the shell might not quite peel off as smoothly as you were hoping, and you’re left with a ruined egg and a big mess. Not to mention, you’re now shorthanded on the number of dishes you can serve. In my case, everyone ended up sharing a dish instead of having their own. Oops.
The other important lesson I learned: if you reheat the eggs using a sous vide setup, make sure the eggs don’t come into contact with the water. The beet-wine marbling comes off rather easily!
I went in the general direction of the plating suggestion they had and it was great. The egg looks mighty bright and Easter-y sitting upon a colorful assortment of vegetables. The texture of the egg was everything you’d expect from using a sous vide setup: an impossibly creamy yolk surrounded by a denser egg white. It was enjoyed at the brunch and I once again learned a lot in my home chemistry lab, the kitchen. Thanks Modernist Cuisine!
Jethro


F’ing awesome.
Pingback: Tidbits: banishing hypotheses, bespoke chocolates/whiskies, and the science of coffee
Lovely.
To counteract the yield loss due to eggs that won’t peel well, try pressure cooking your eggs. I don’t know how it works (I have theories!) but it does, every time!
http://feedme.typepad.com/my_weblog/2012/02/easy-peel-boiled-eggs-from-a-pressure-cooker.html
Thanks for the tip. Although it might make it easier to peel the eggs, it will also cook the eggs at 130C, whereas to keep the yolk liquid but fully cooked for this recipe it needs to be at 62C for 30 minutes. It’s definitely worth experimenting with to see if similar results can be achieved.